Quickstart
Step-by-step tutorial for learning basic concepts how to quickly get started with Bult and create a first project.
Preparation
Registration on platform
Lets start with sign-up at https://bult.pro/cabinet/sign-up.
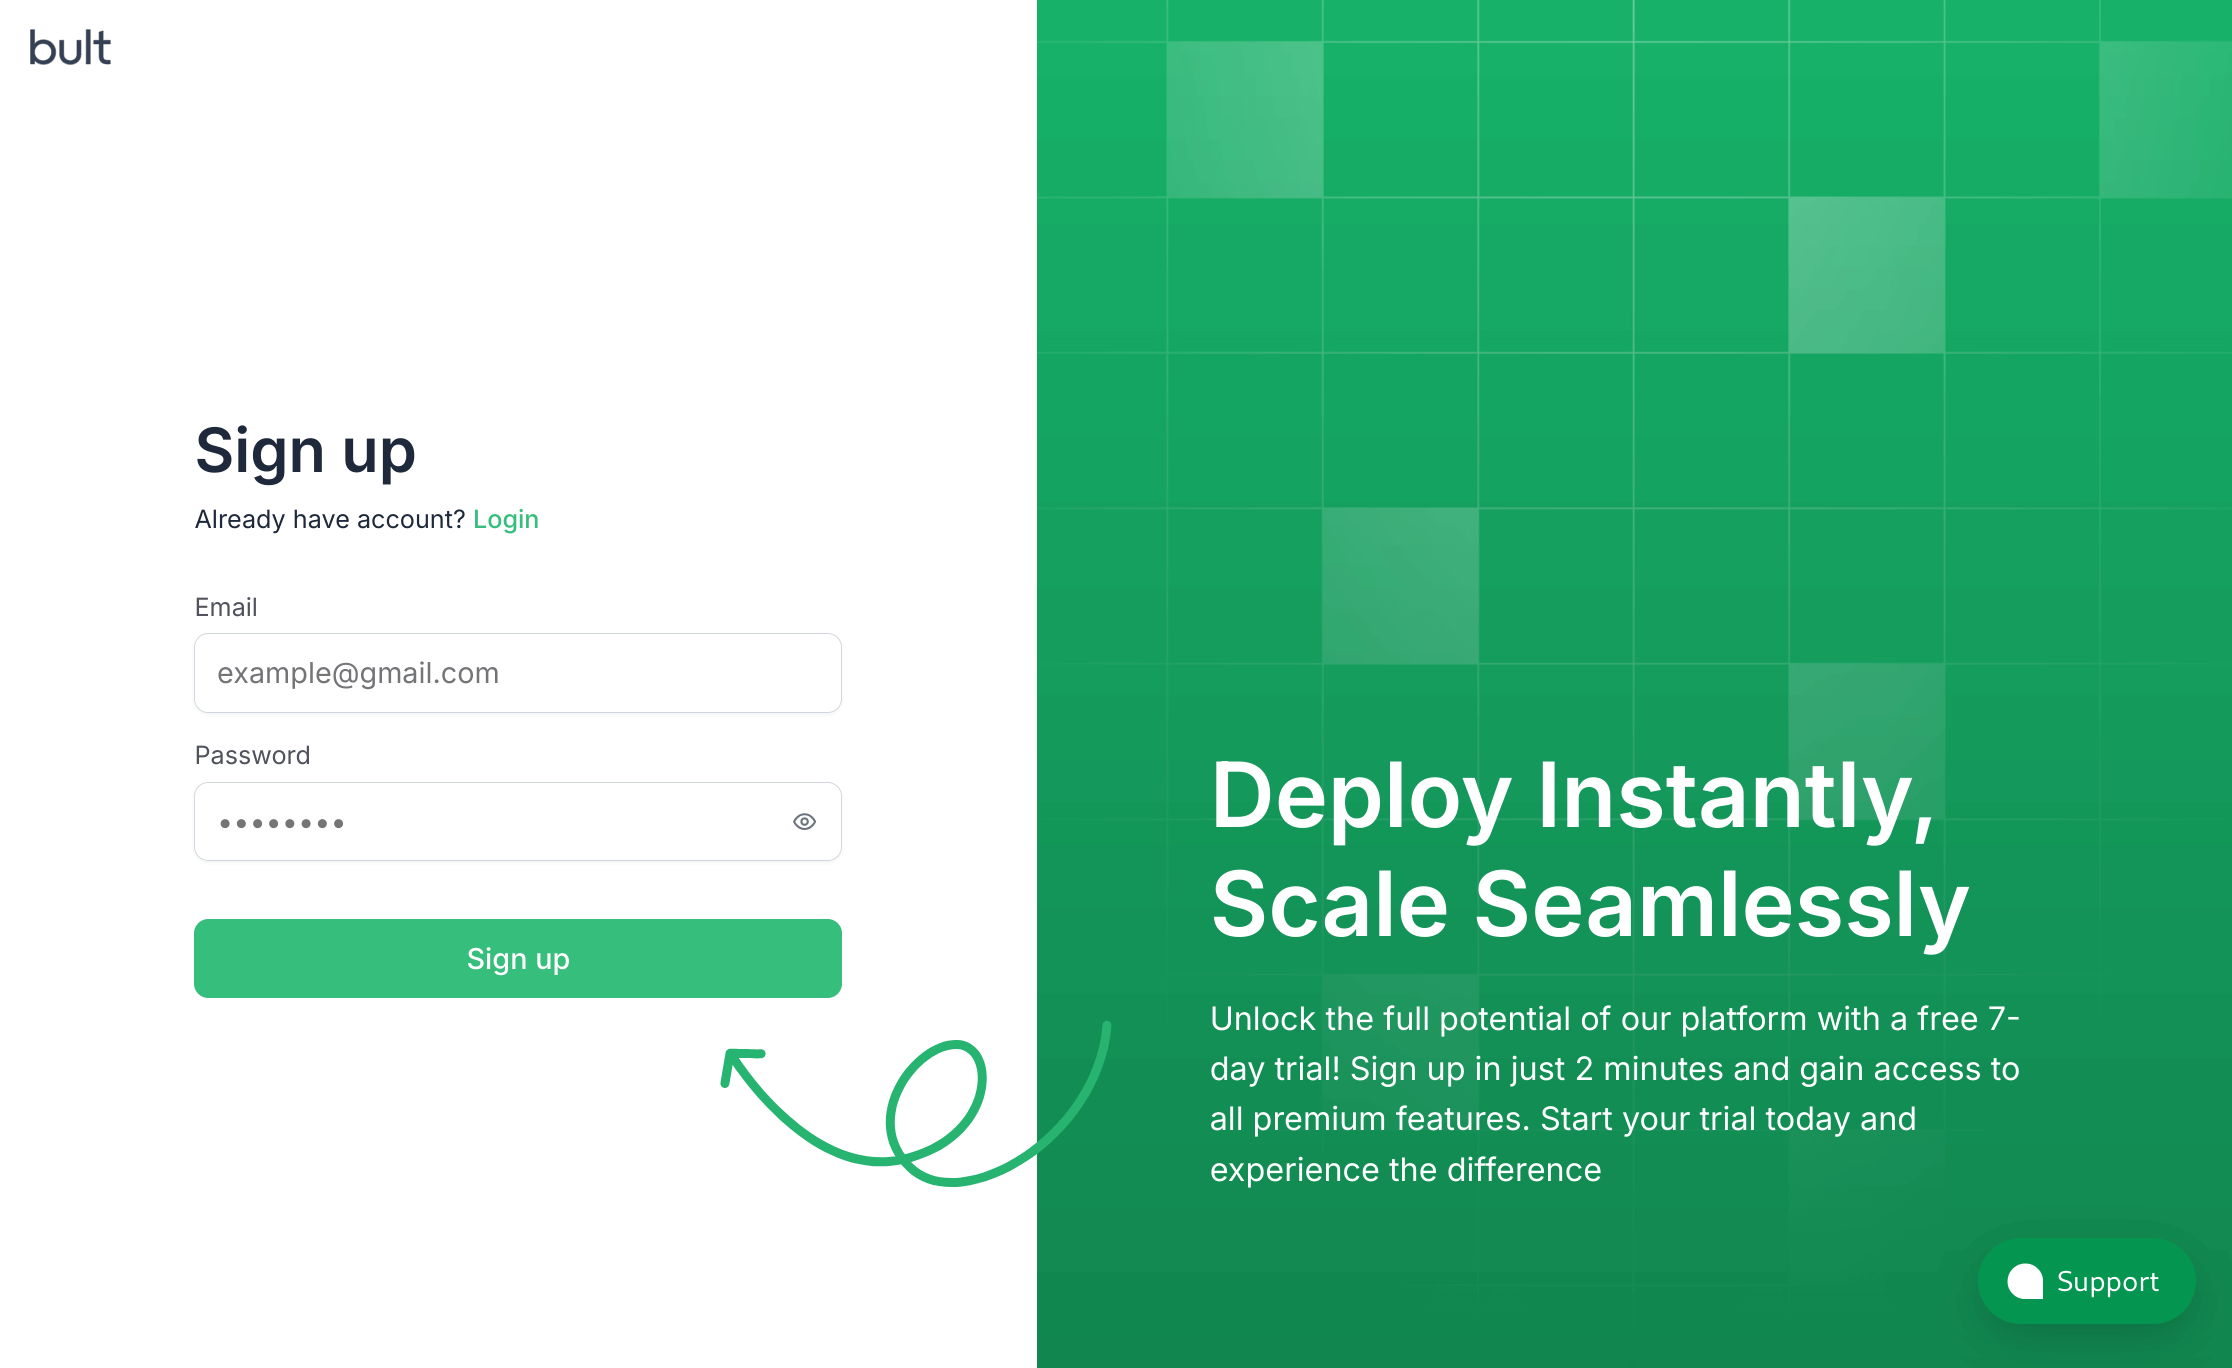
Fill the Email and Password fields and click the Sign up button.
After successful registration, you will receive an email with a link to confirm your email.
By confirming your mailbox using the link from the letter, you will be able to sign in to your account. Welcome to your new Workspace!
Project creation
After logging into your account for the first time, you will view the projects page with a proposal to create a new project.
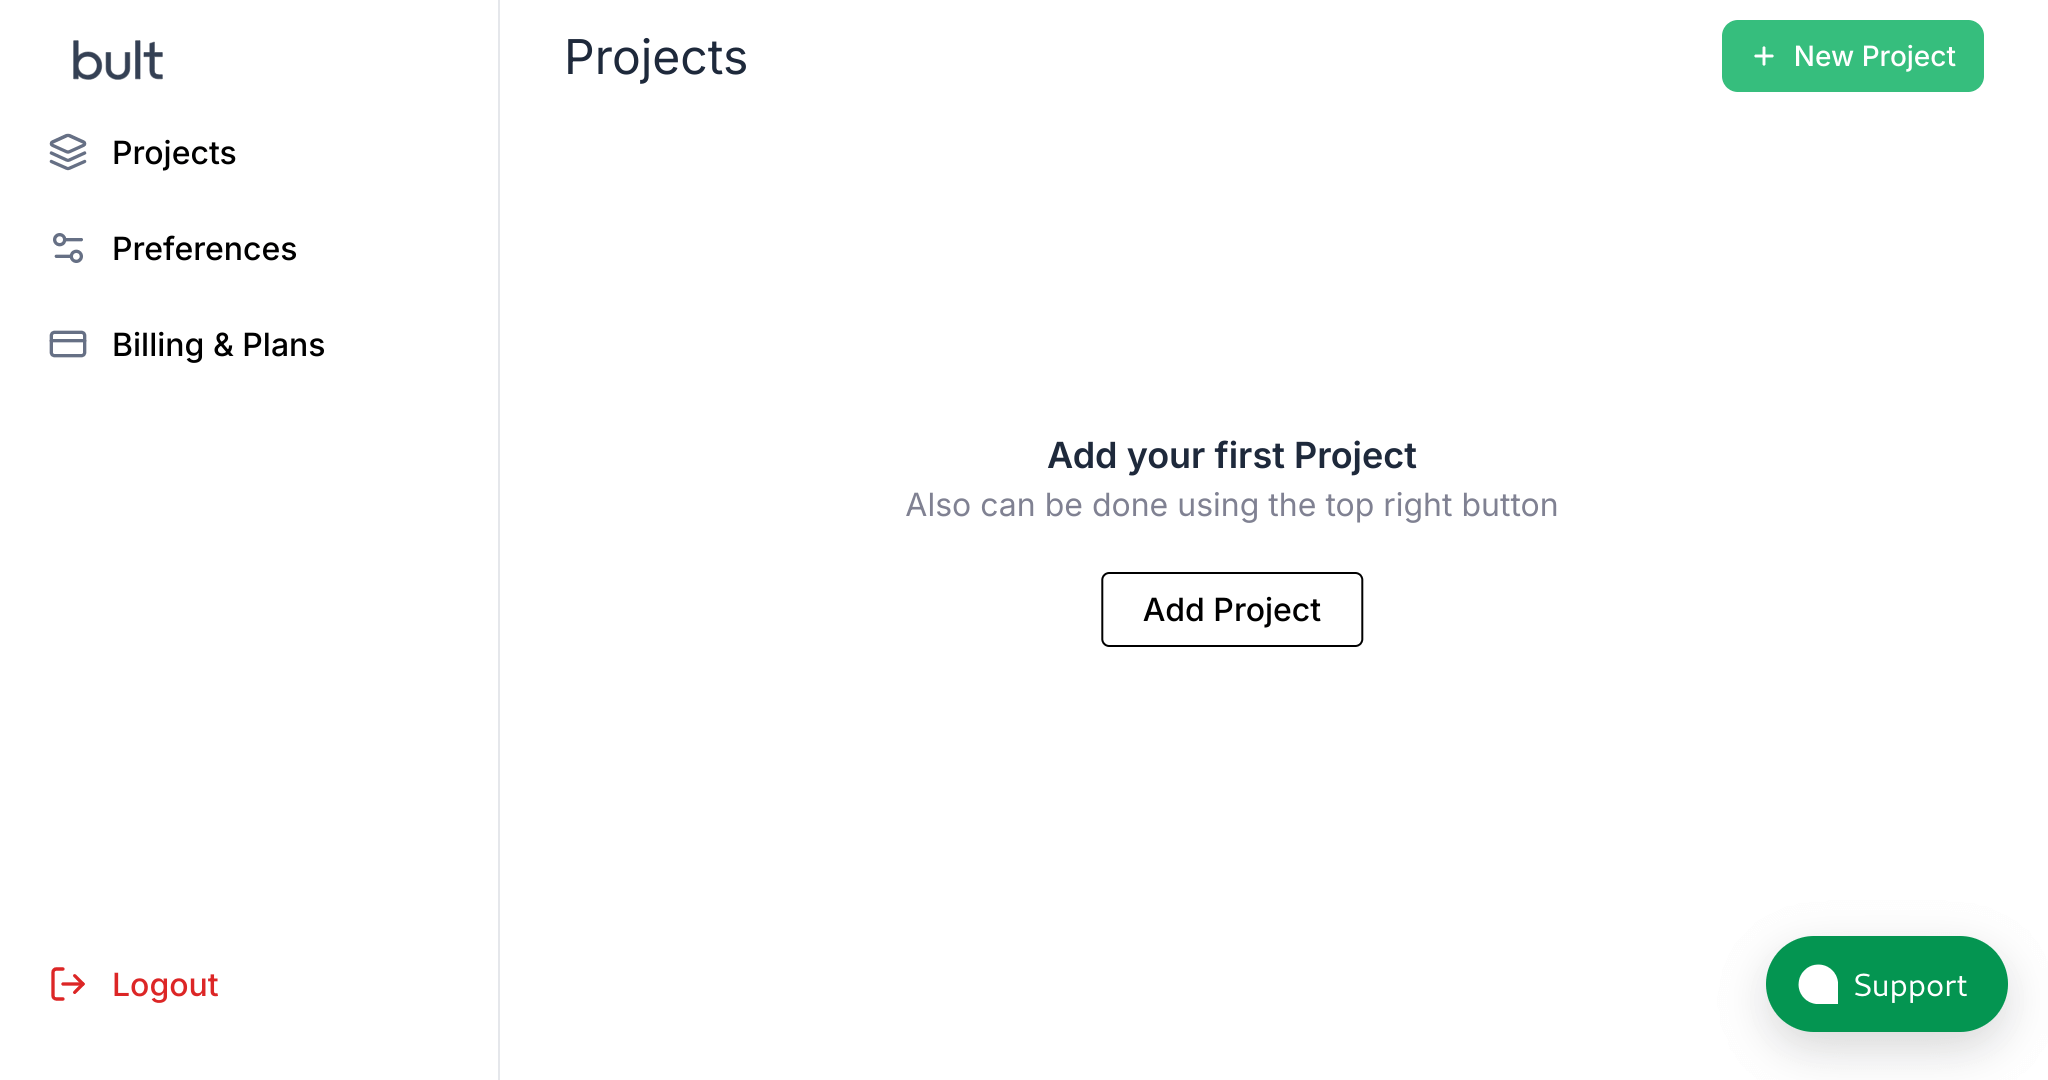
Click the New Project button and in the window that appears, enter a name. For our example it will be Personal blog. Then click Continue.
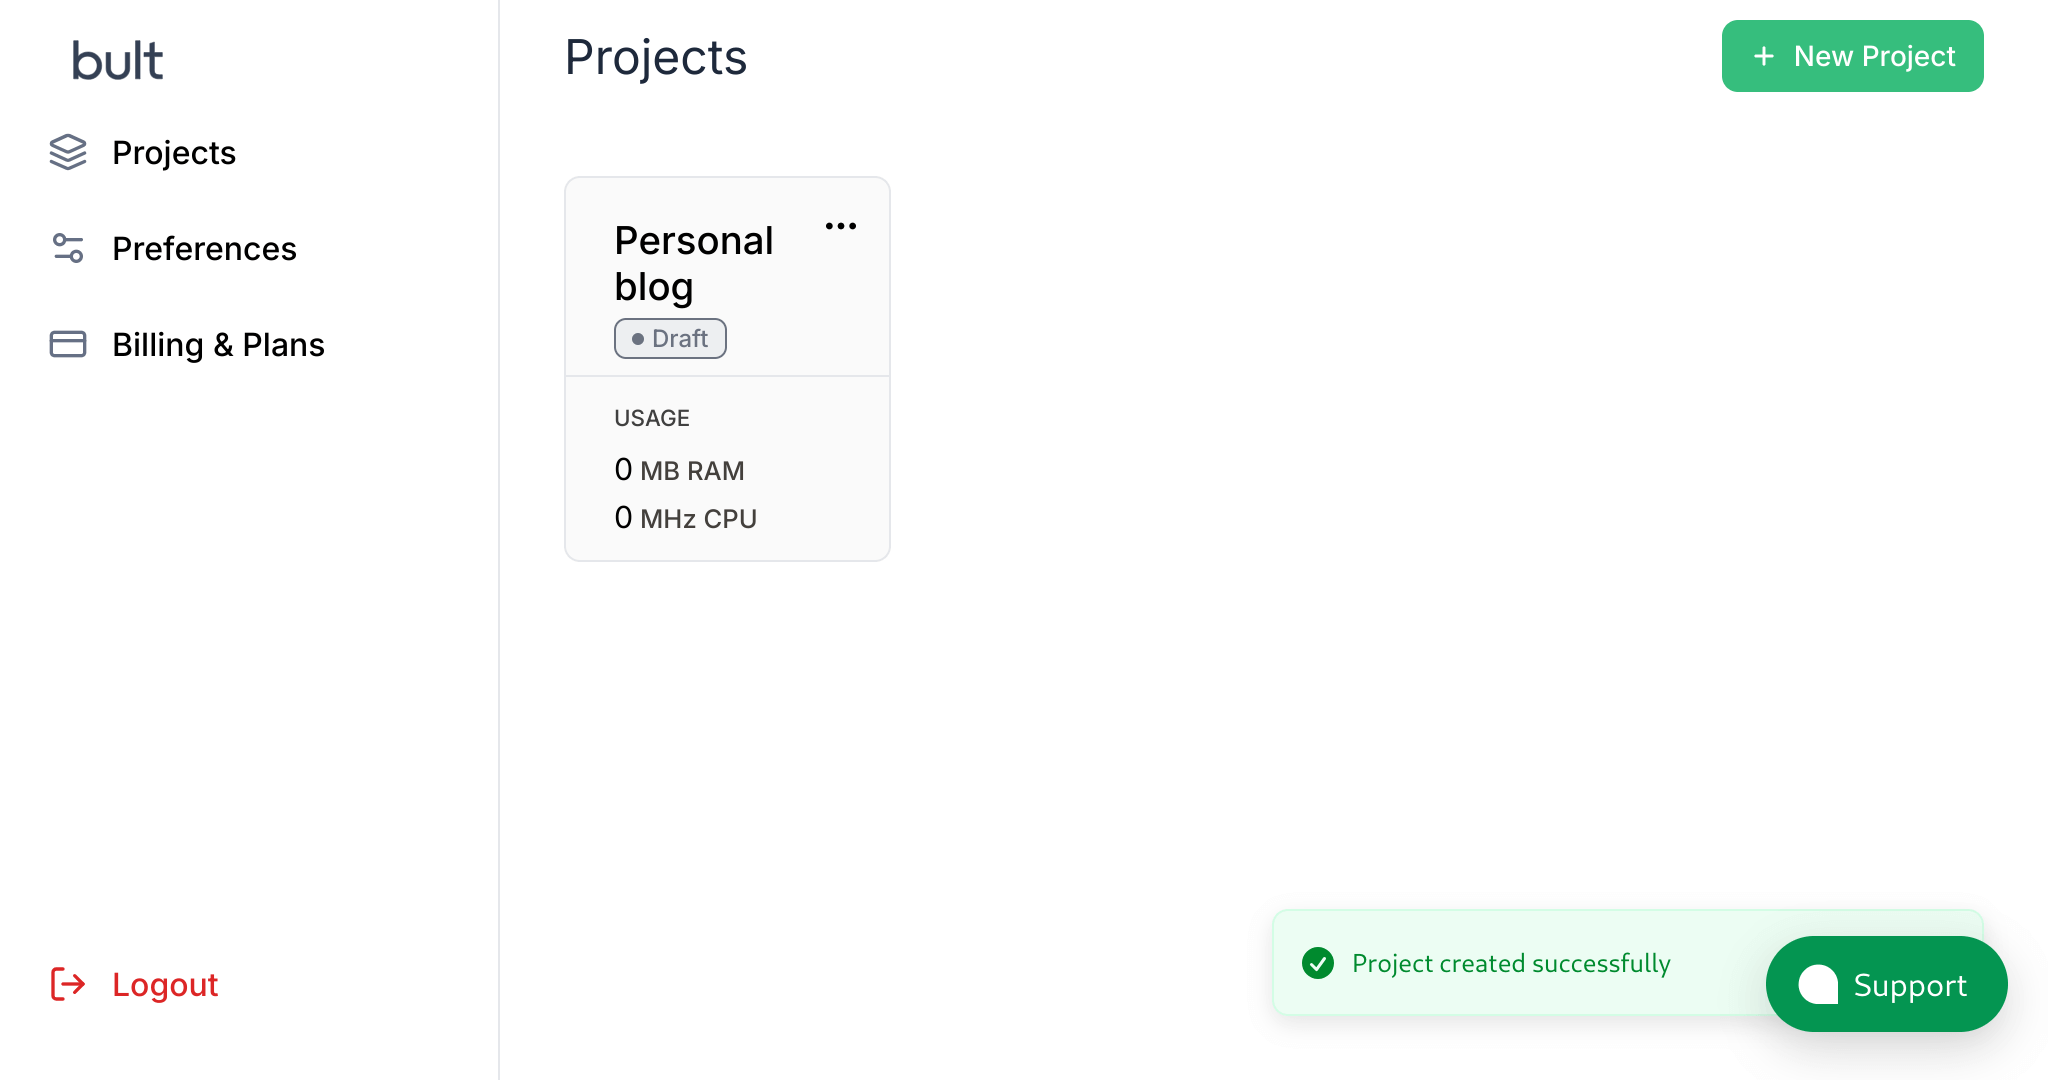
The newly created project immediately appears in the list of all projects. Go to it by clicking on the project card.
1. Deploying the application
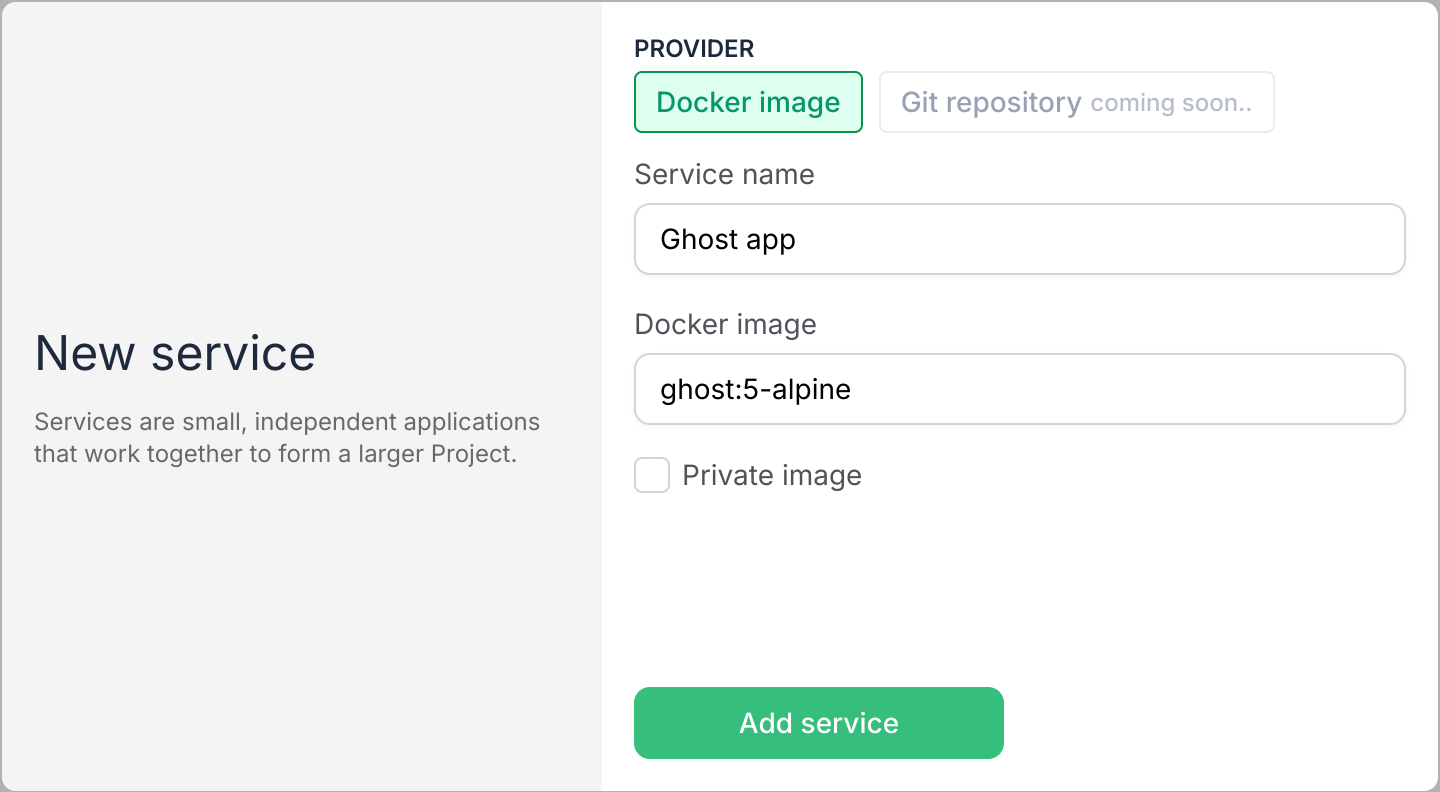
Click the Add Service button and fill in the fields:
- Service name. The name of the service we are adding. Let's name it
Ghost app; - Docker image. The name of the image to deploy. The format is the same as for the
docker pullcommand. The list of public docker images can be found on https://hub.docker.com/ repository. For our application we will specifyghost:5-alpine.
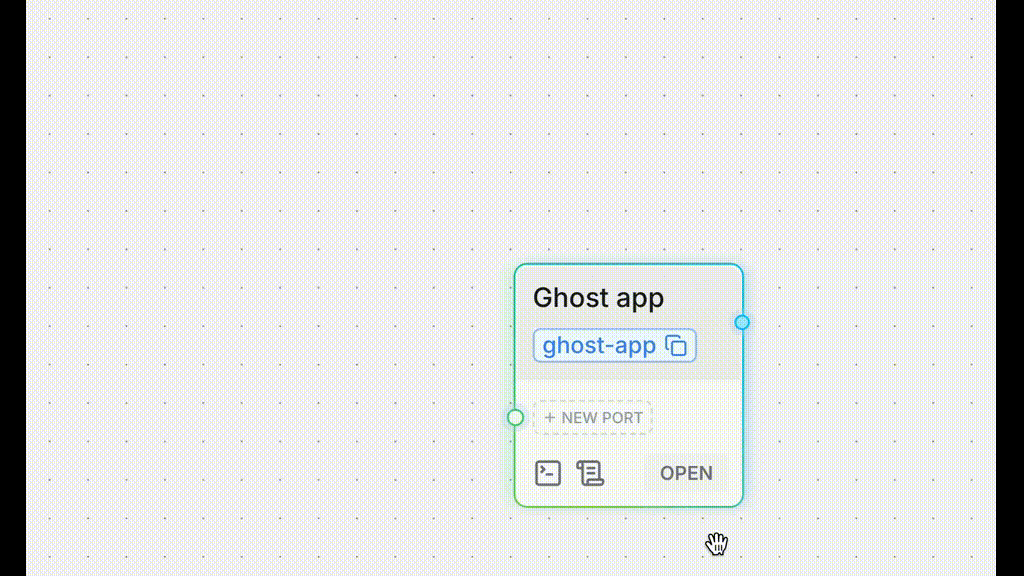
After submitting Add service a new service will appear on the screen. While the project is not running yet, we can set additional starting options.
Service Configuration
Click Open on the service card.
The Service settings tab allows you to set general service settings. Let's increase the resources for the service up to 512Mb RAM and 1Ghz CPU: enter 512 value in the RAM field and 1024 value in the CPU field.
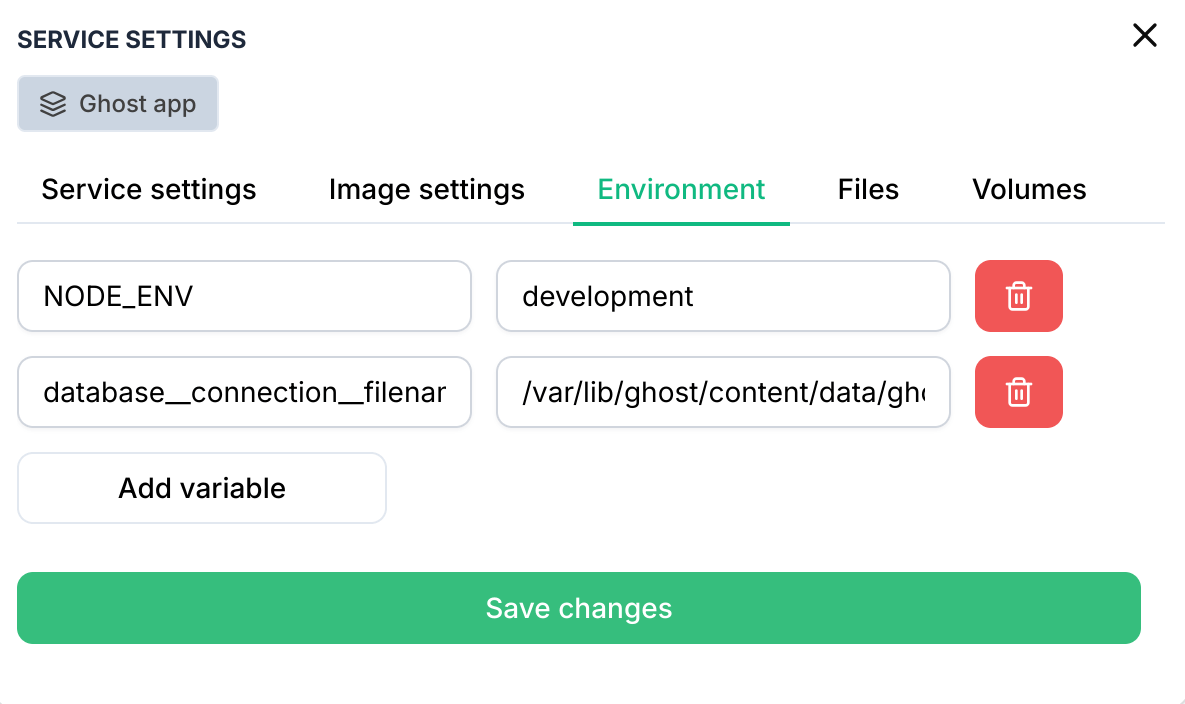
Let's switch to the Environment tab, which contains service environment variables. According to the Ghost docker image page, set the NODE_ENV value in development and database__connection__filename value in /var/lib/ghost/content/data/ghost.db.
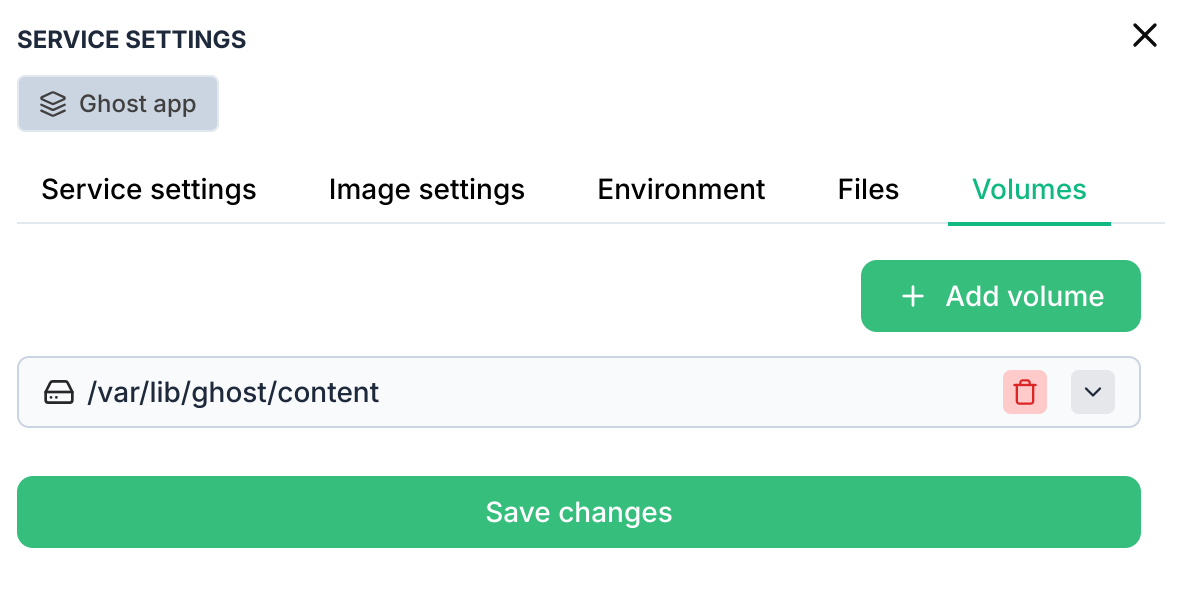
On the Volumes tab, add a persistent volume to the /var/lib/ghost/content folder to persist the state of the service between restarts.
At this stage, the service is created and you can start launching the project.
First project launch
During the first launch, you will be asked to activate a free trial period to familiarize yourself with the platform. Let's go to billing and link a payment card.
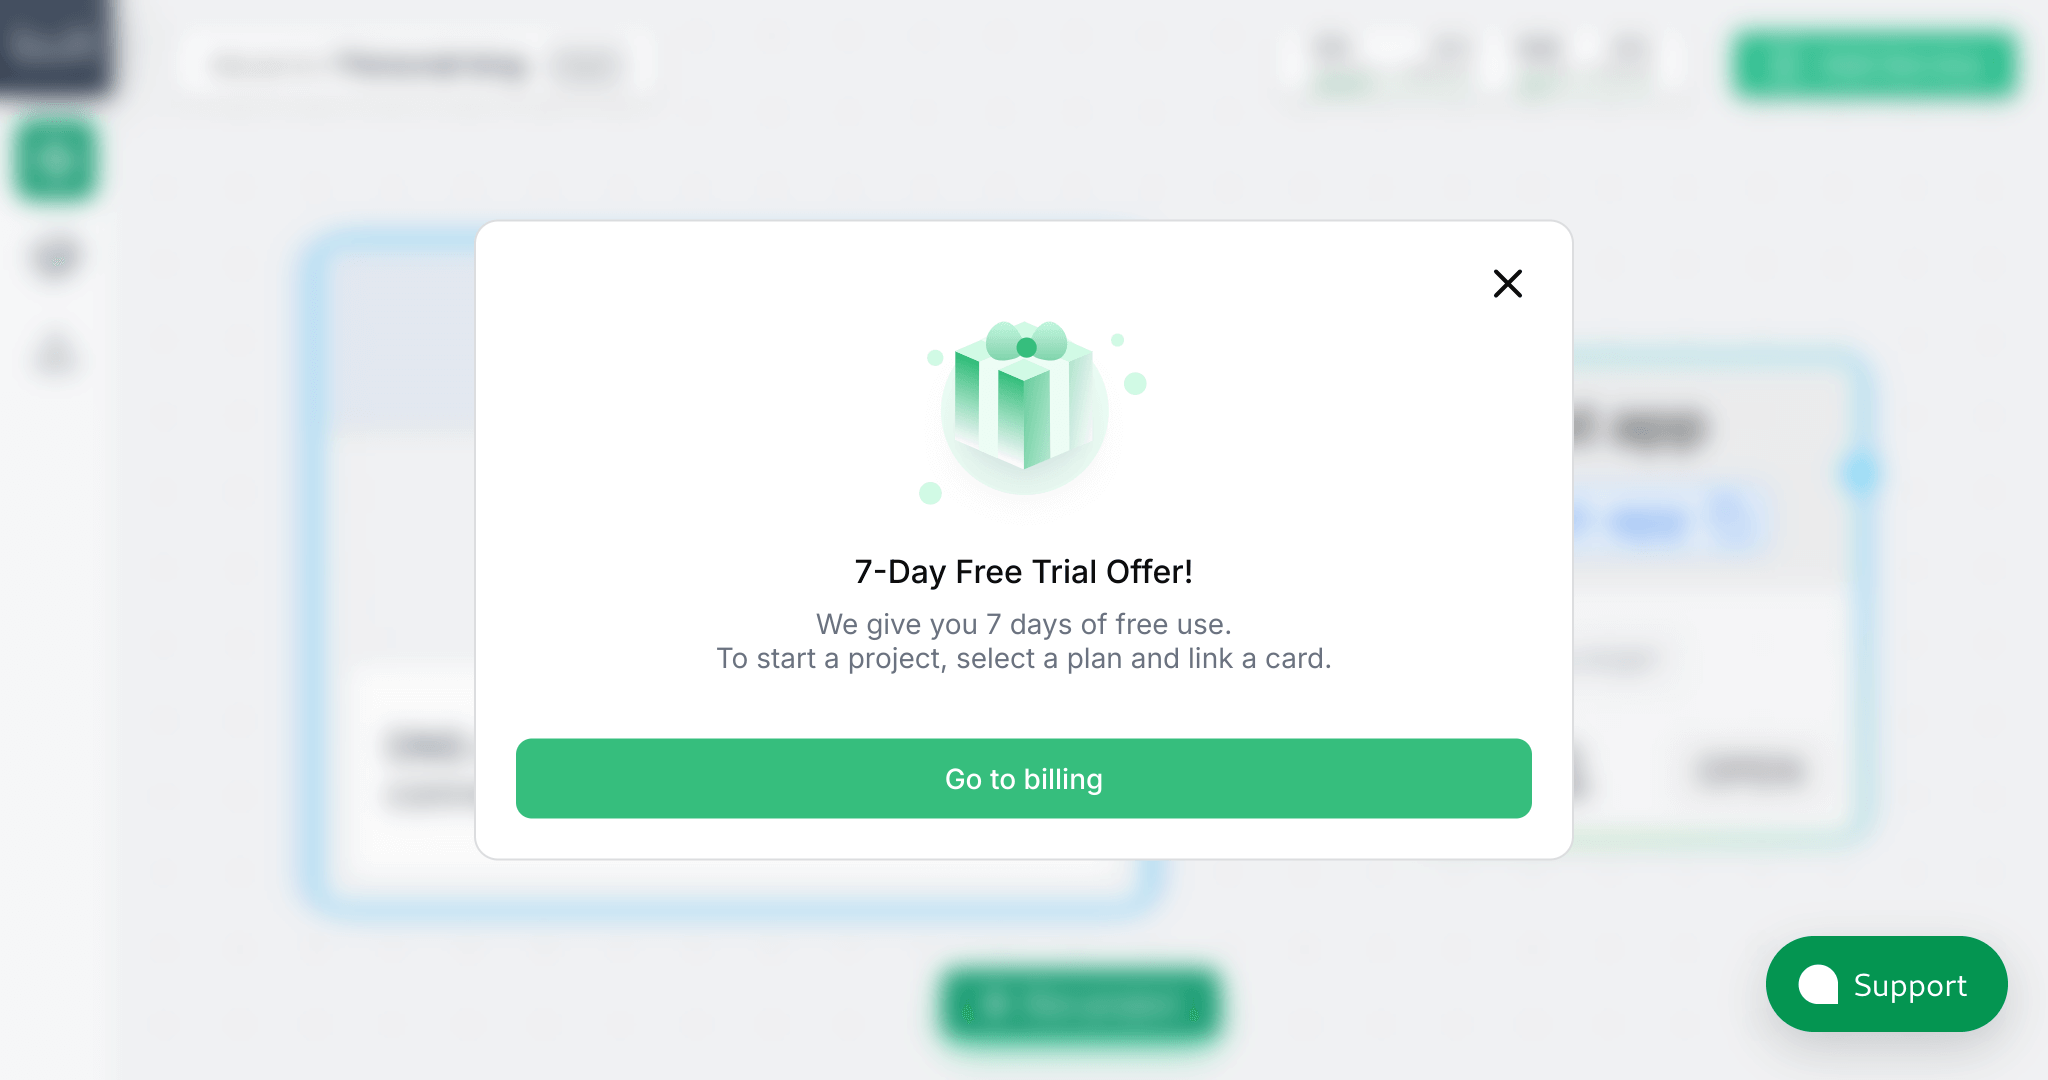
After adding the card, let's go back to our project and wait for a couple of minutes for the server to be created to run the project on. Once the server is created, the Run project button will become available and we can run the project by clicking on it.
Once all the previous steps have been completed, the project status will change from Pending to Running. You can view the application startup logs by clicking on the scroll icon.
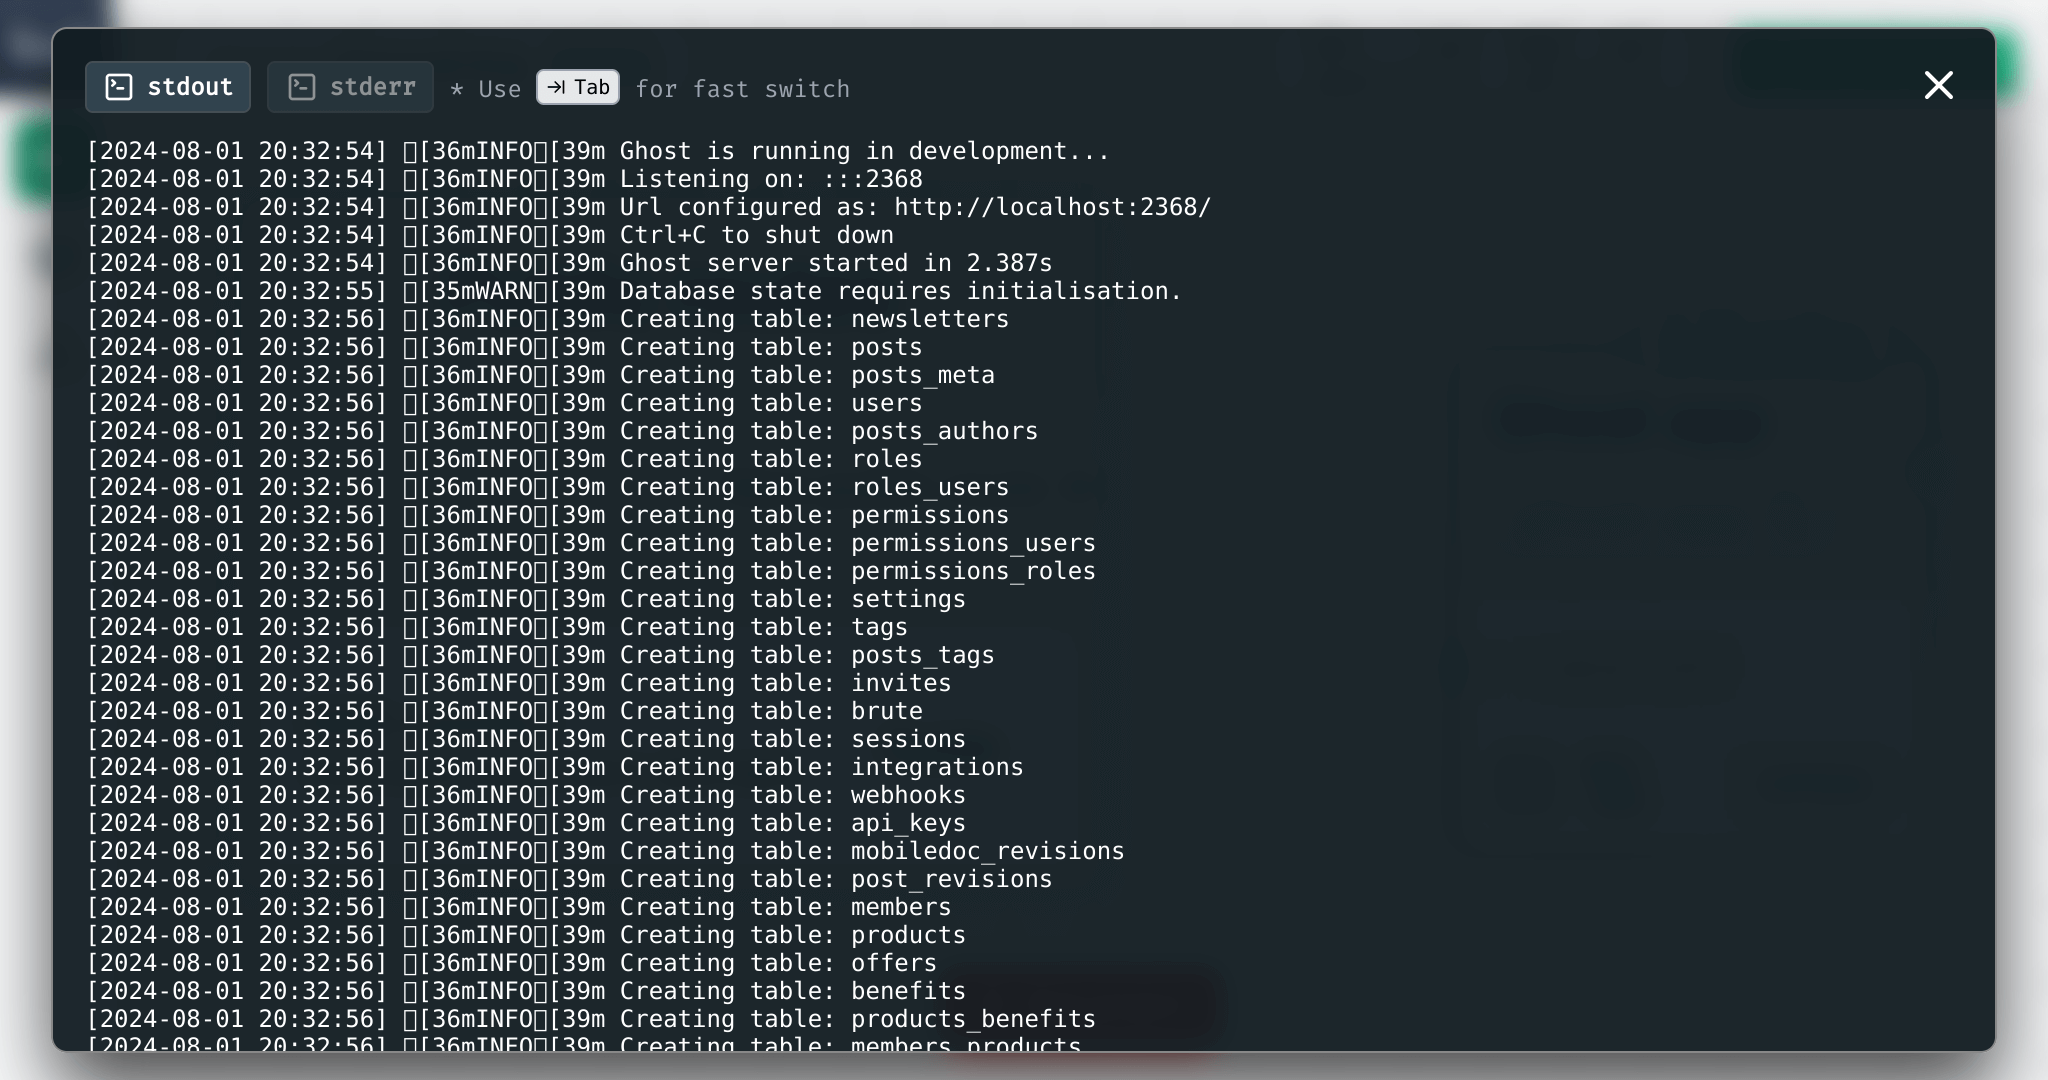
Click the terminal icon and execute the wget -O- localhost:2368 command inside the service container. In response, we will see the webserver output. This means that the application is running successfully.
Good job! МWe just launched our first project.
2. Domain binding
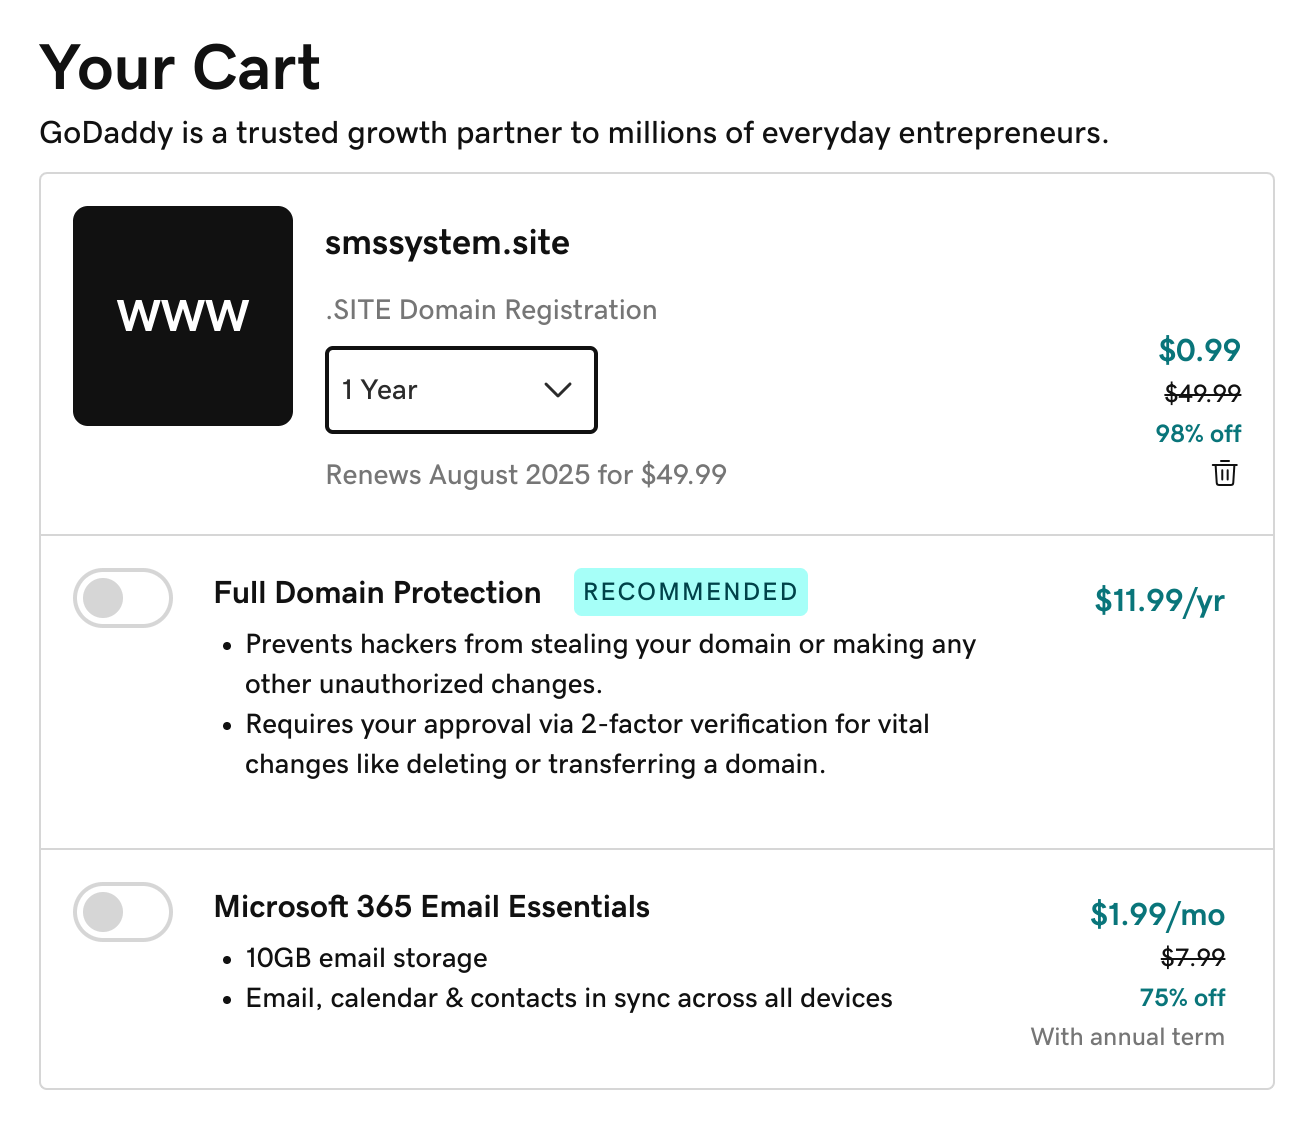
Before performing the next steps, you should already have a domain name from any of the domain name registrars that allows you to bind a DNS record to the site. If you do not have such a domain, you need to create it. For the sake of this example, let's use GoDaddy service.
So far our service is up and running, but we can't access it directly from the web. Let's fix that.
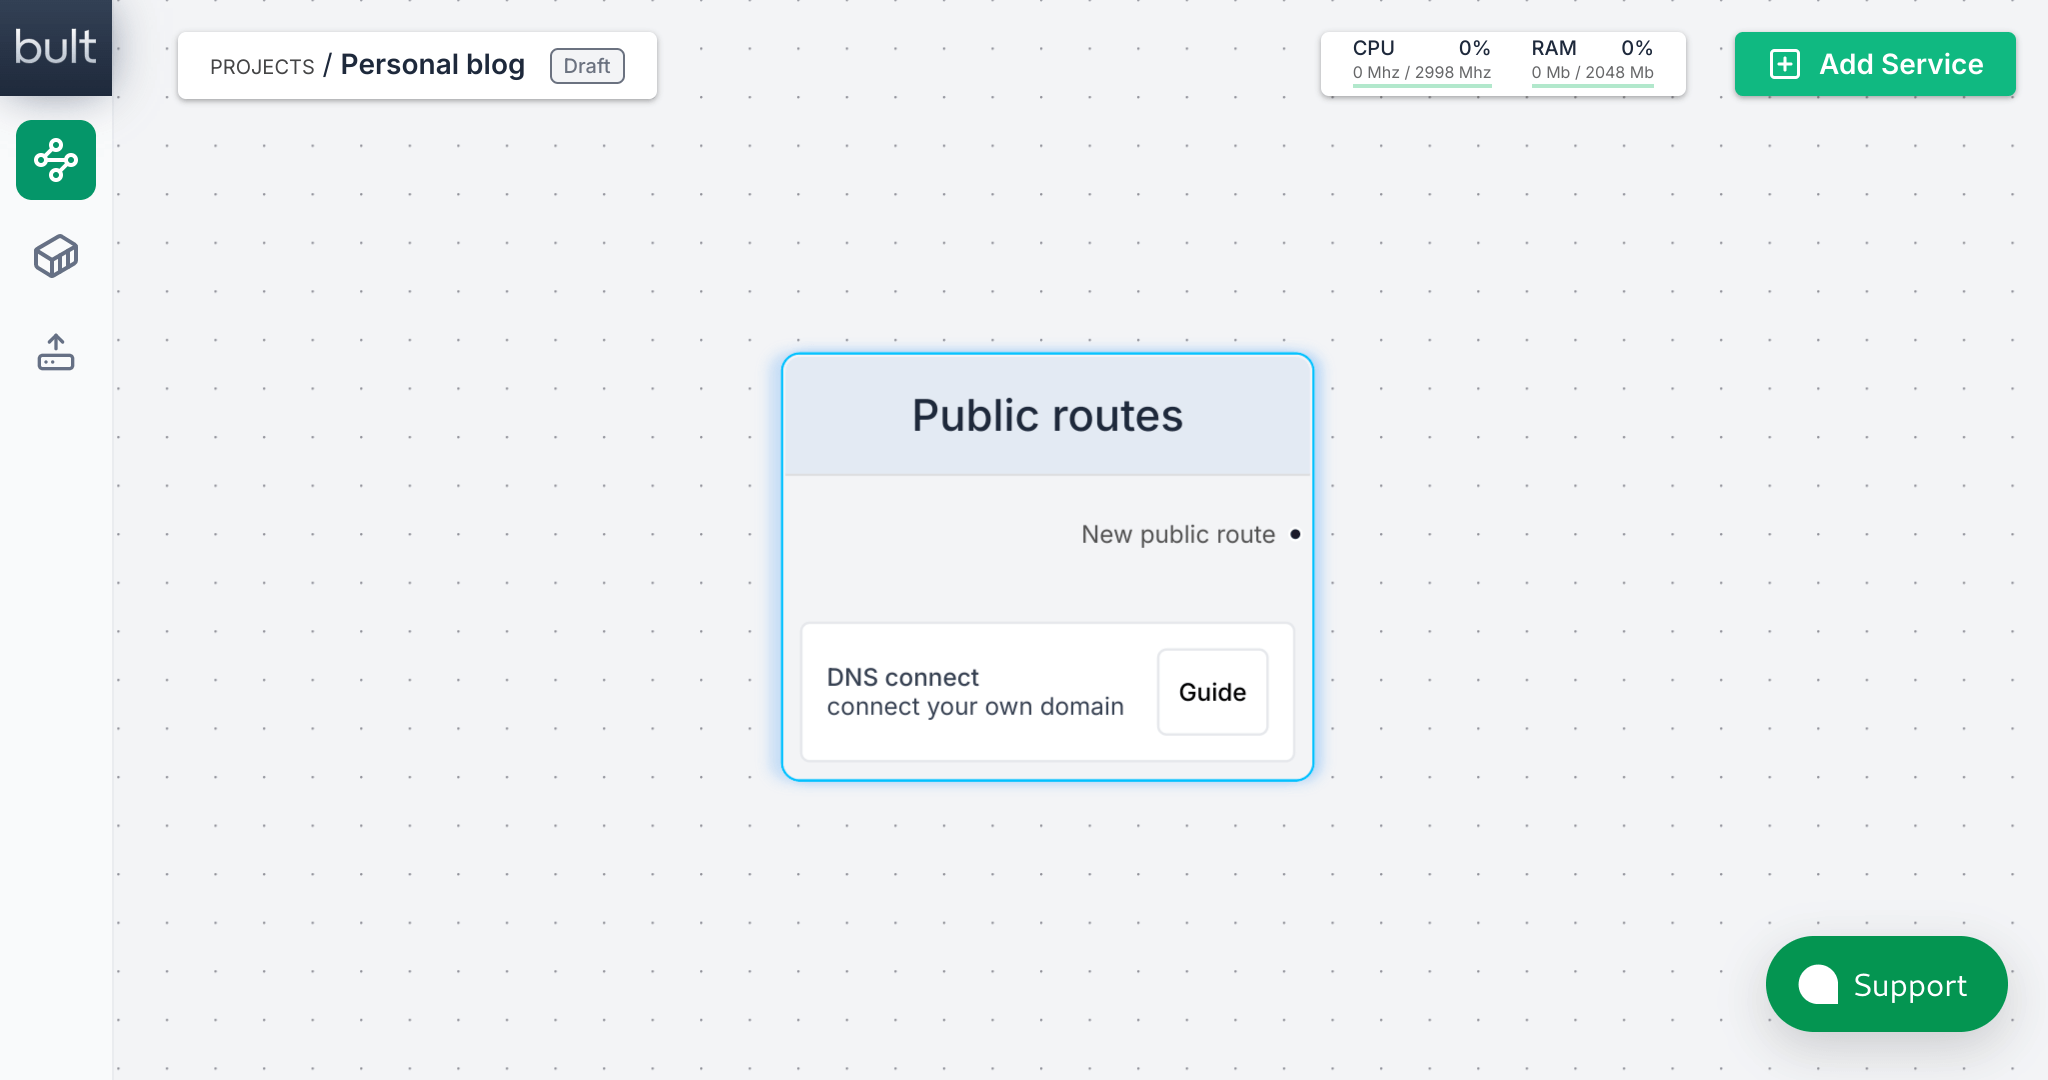
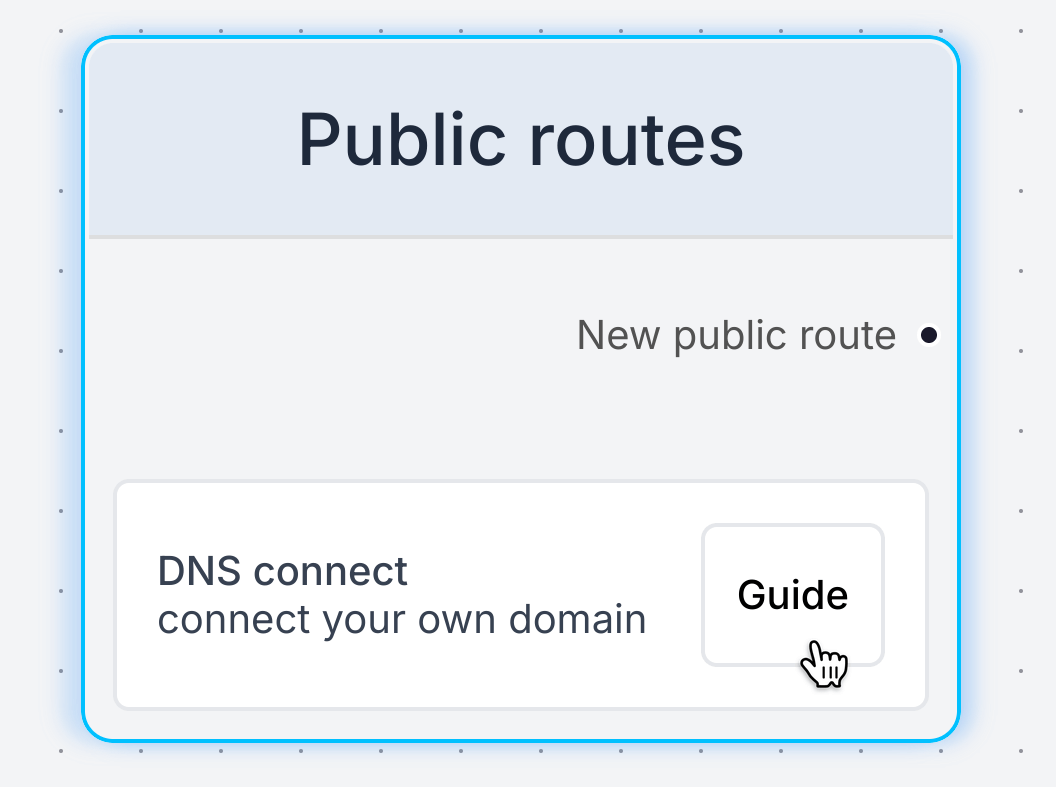
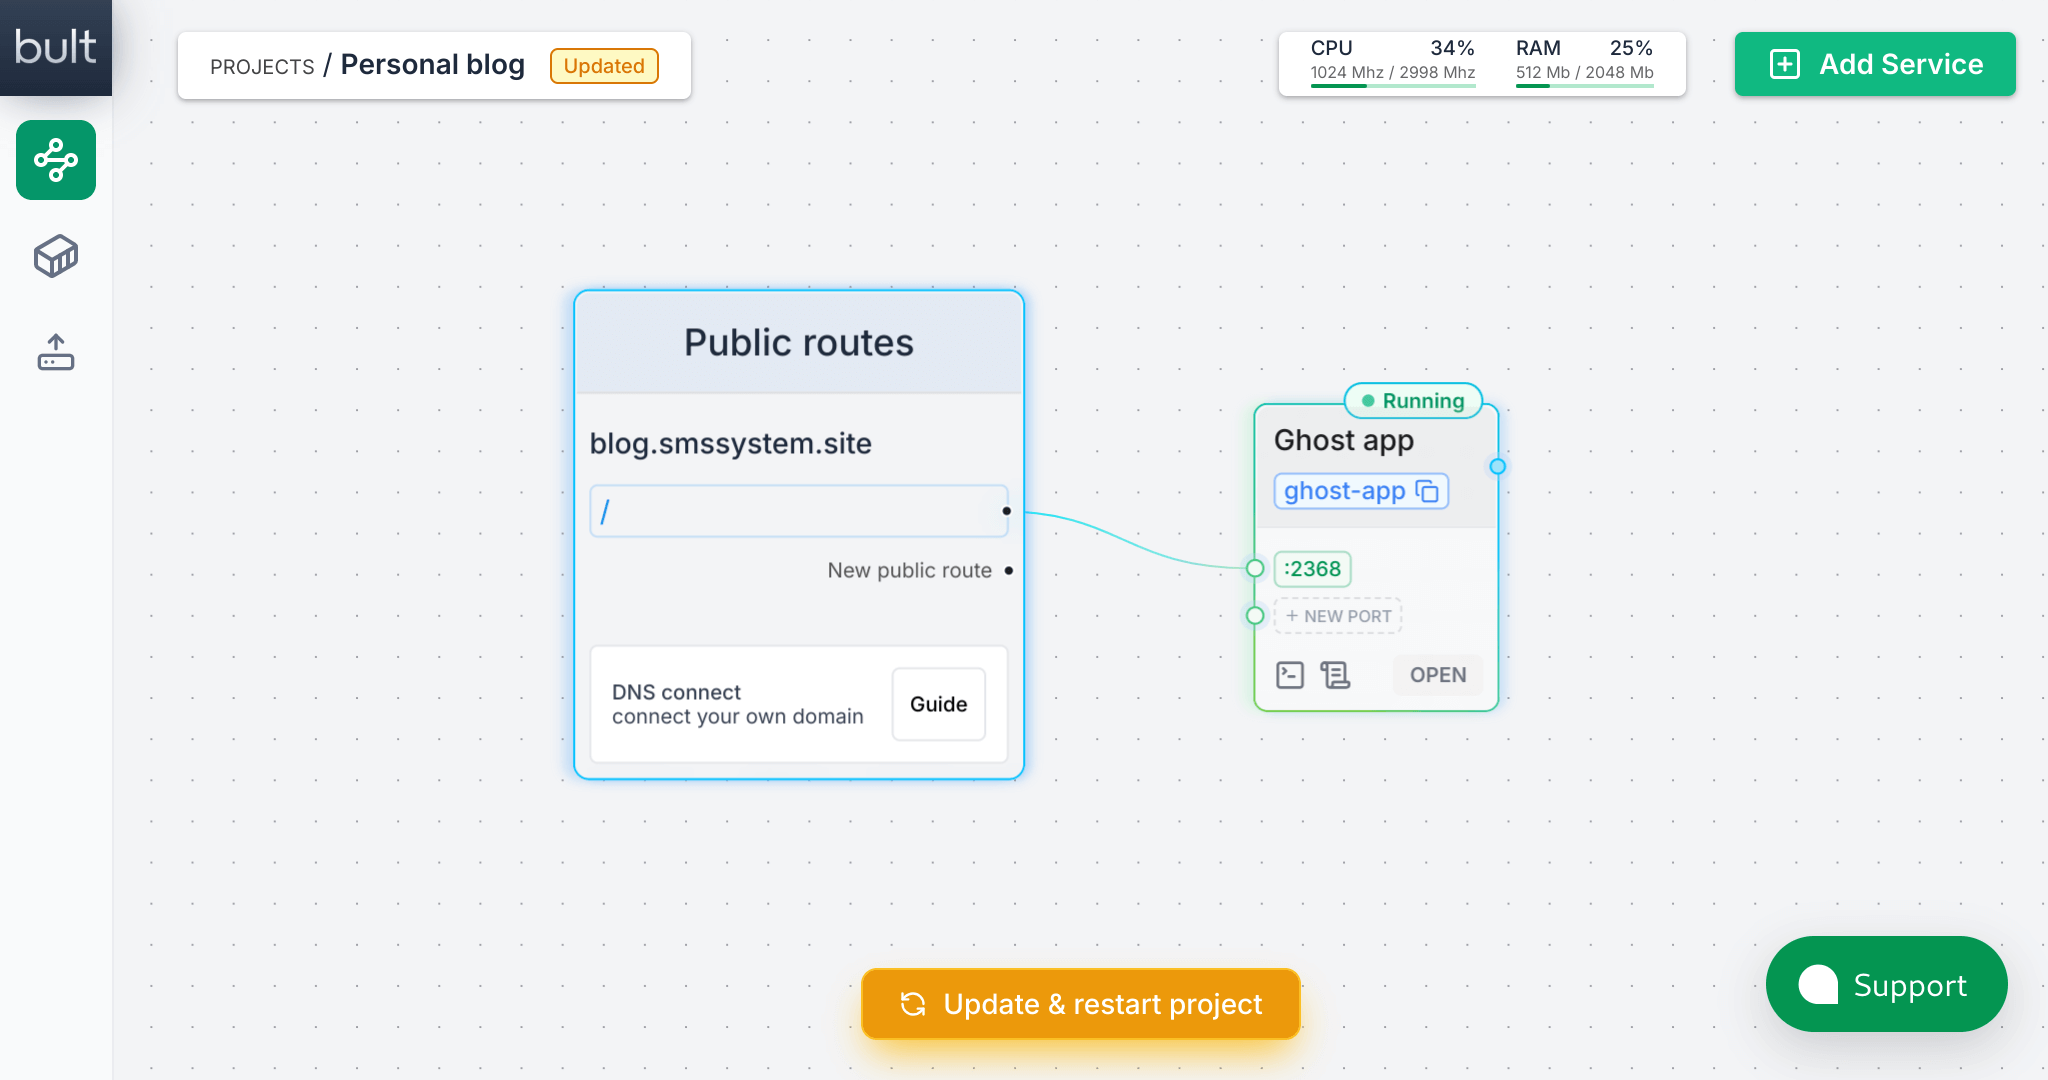
First, click on the Guide button of the Public routes card to find out the IP address of the server.
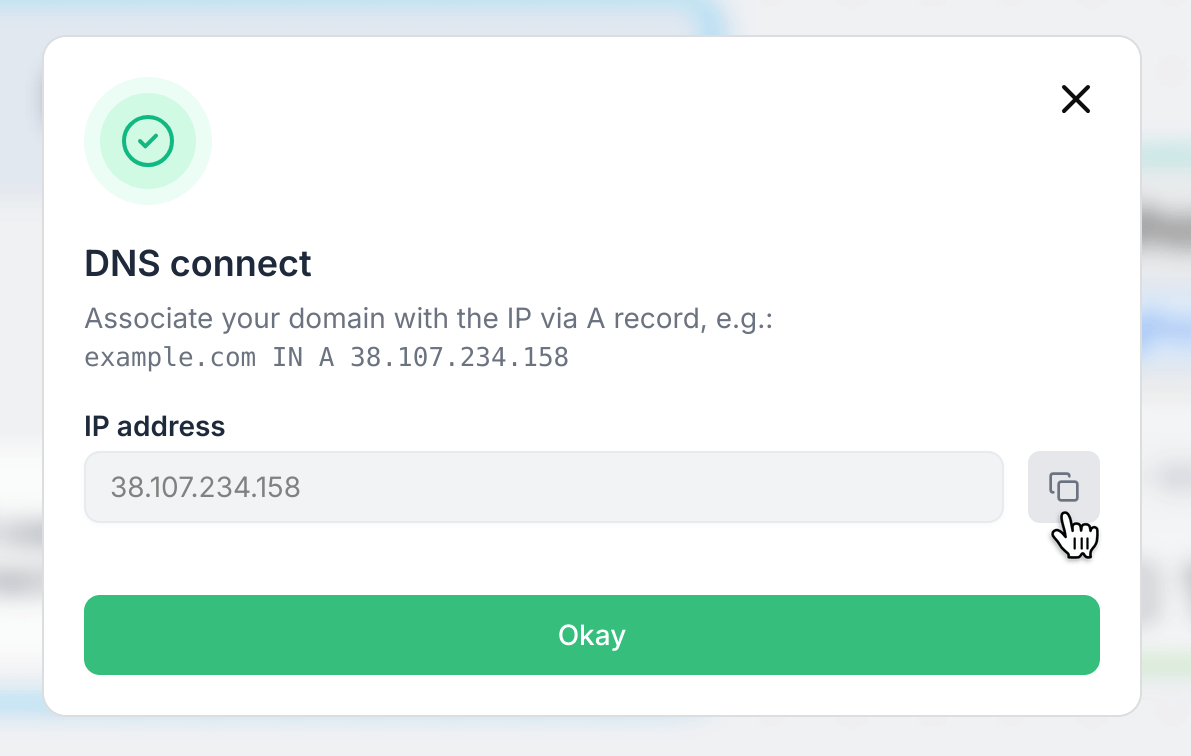
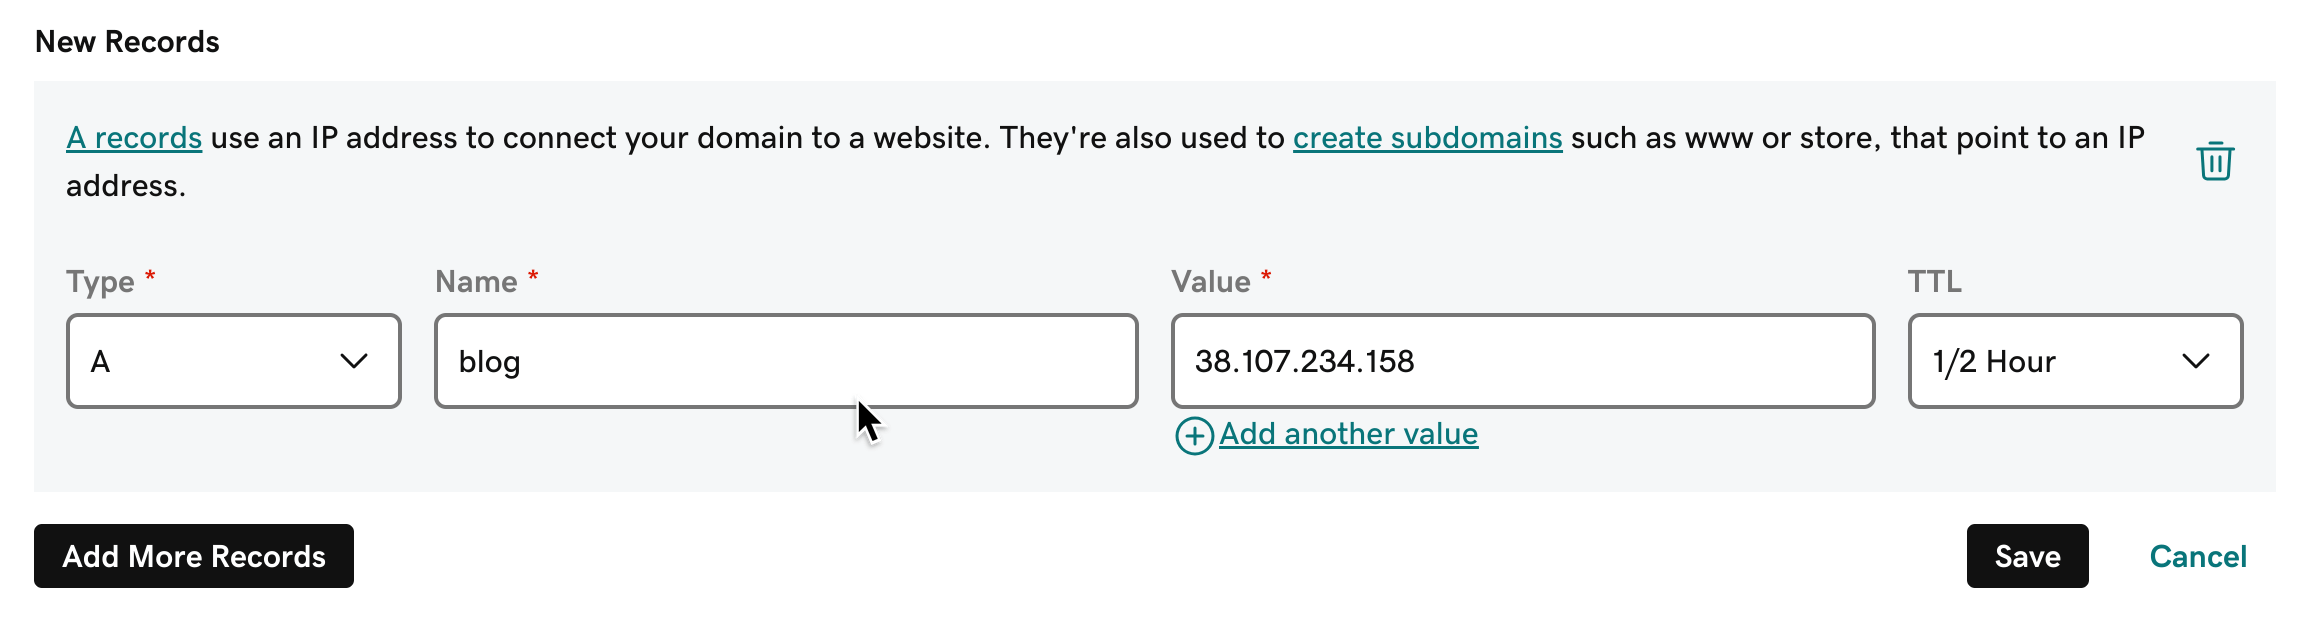
Next, in a new browser tab, open the DNS records control panel for your domain (for GoDaddy go to: https://dcc.godaddy.com/control/dnsmanagement). Then, create a new A record linking the domain to the IP address of your project on the Bult platform.
Once the record has been created, and running ping command for the domain outputs the IP, you can move on to linking the service to the domain. To do this, draw a line from the New public route to the New port point of the Ghost app service using mouse drag.
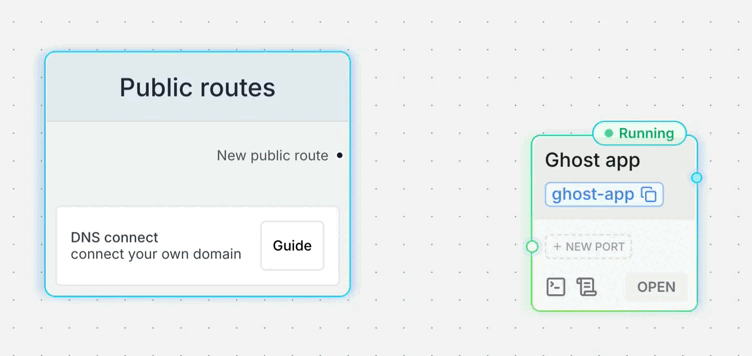
In the field on the left enter the domain. And in the field on the right - the port of the service the web server is running on. For Ghost application it's 2368.
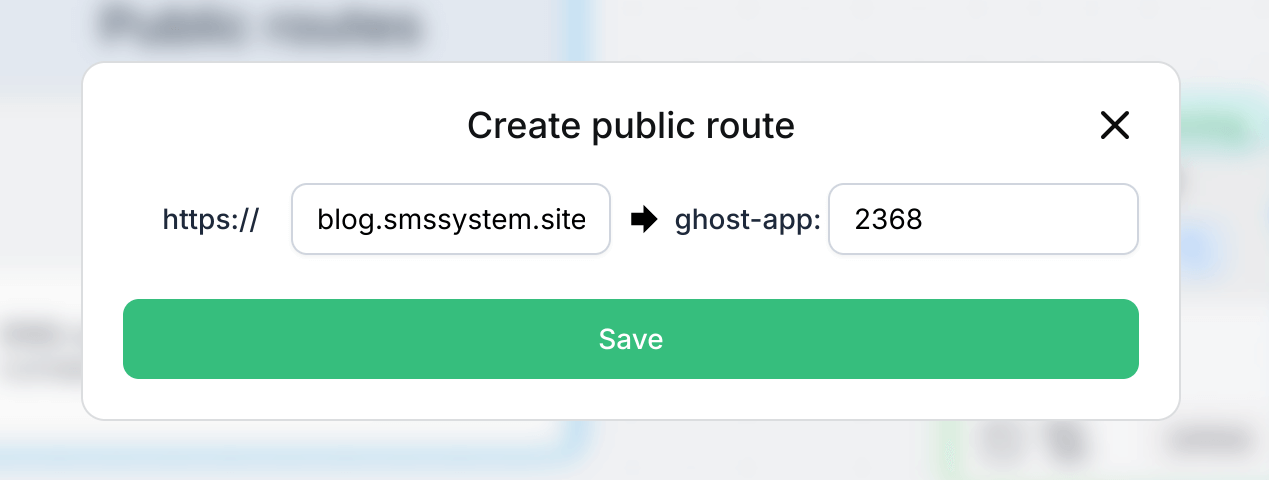
After creating a public route, the button at the bottom of the page will change to Update & restart project, indicating that new changes have been made.
By restarting the project, the new changes will be applied and the application will be available at the public URL. Note that the service was not restarted at this point.
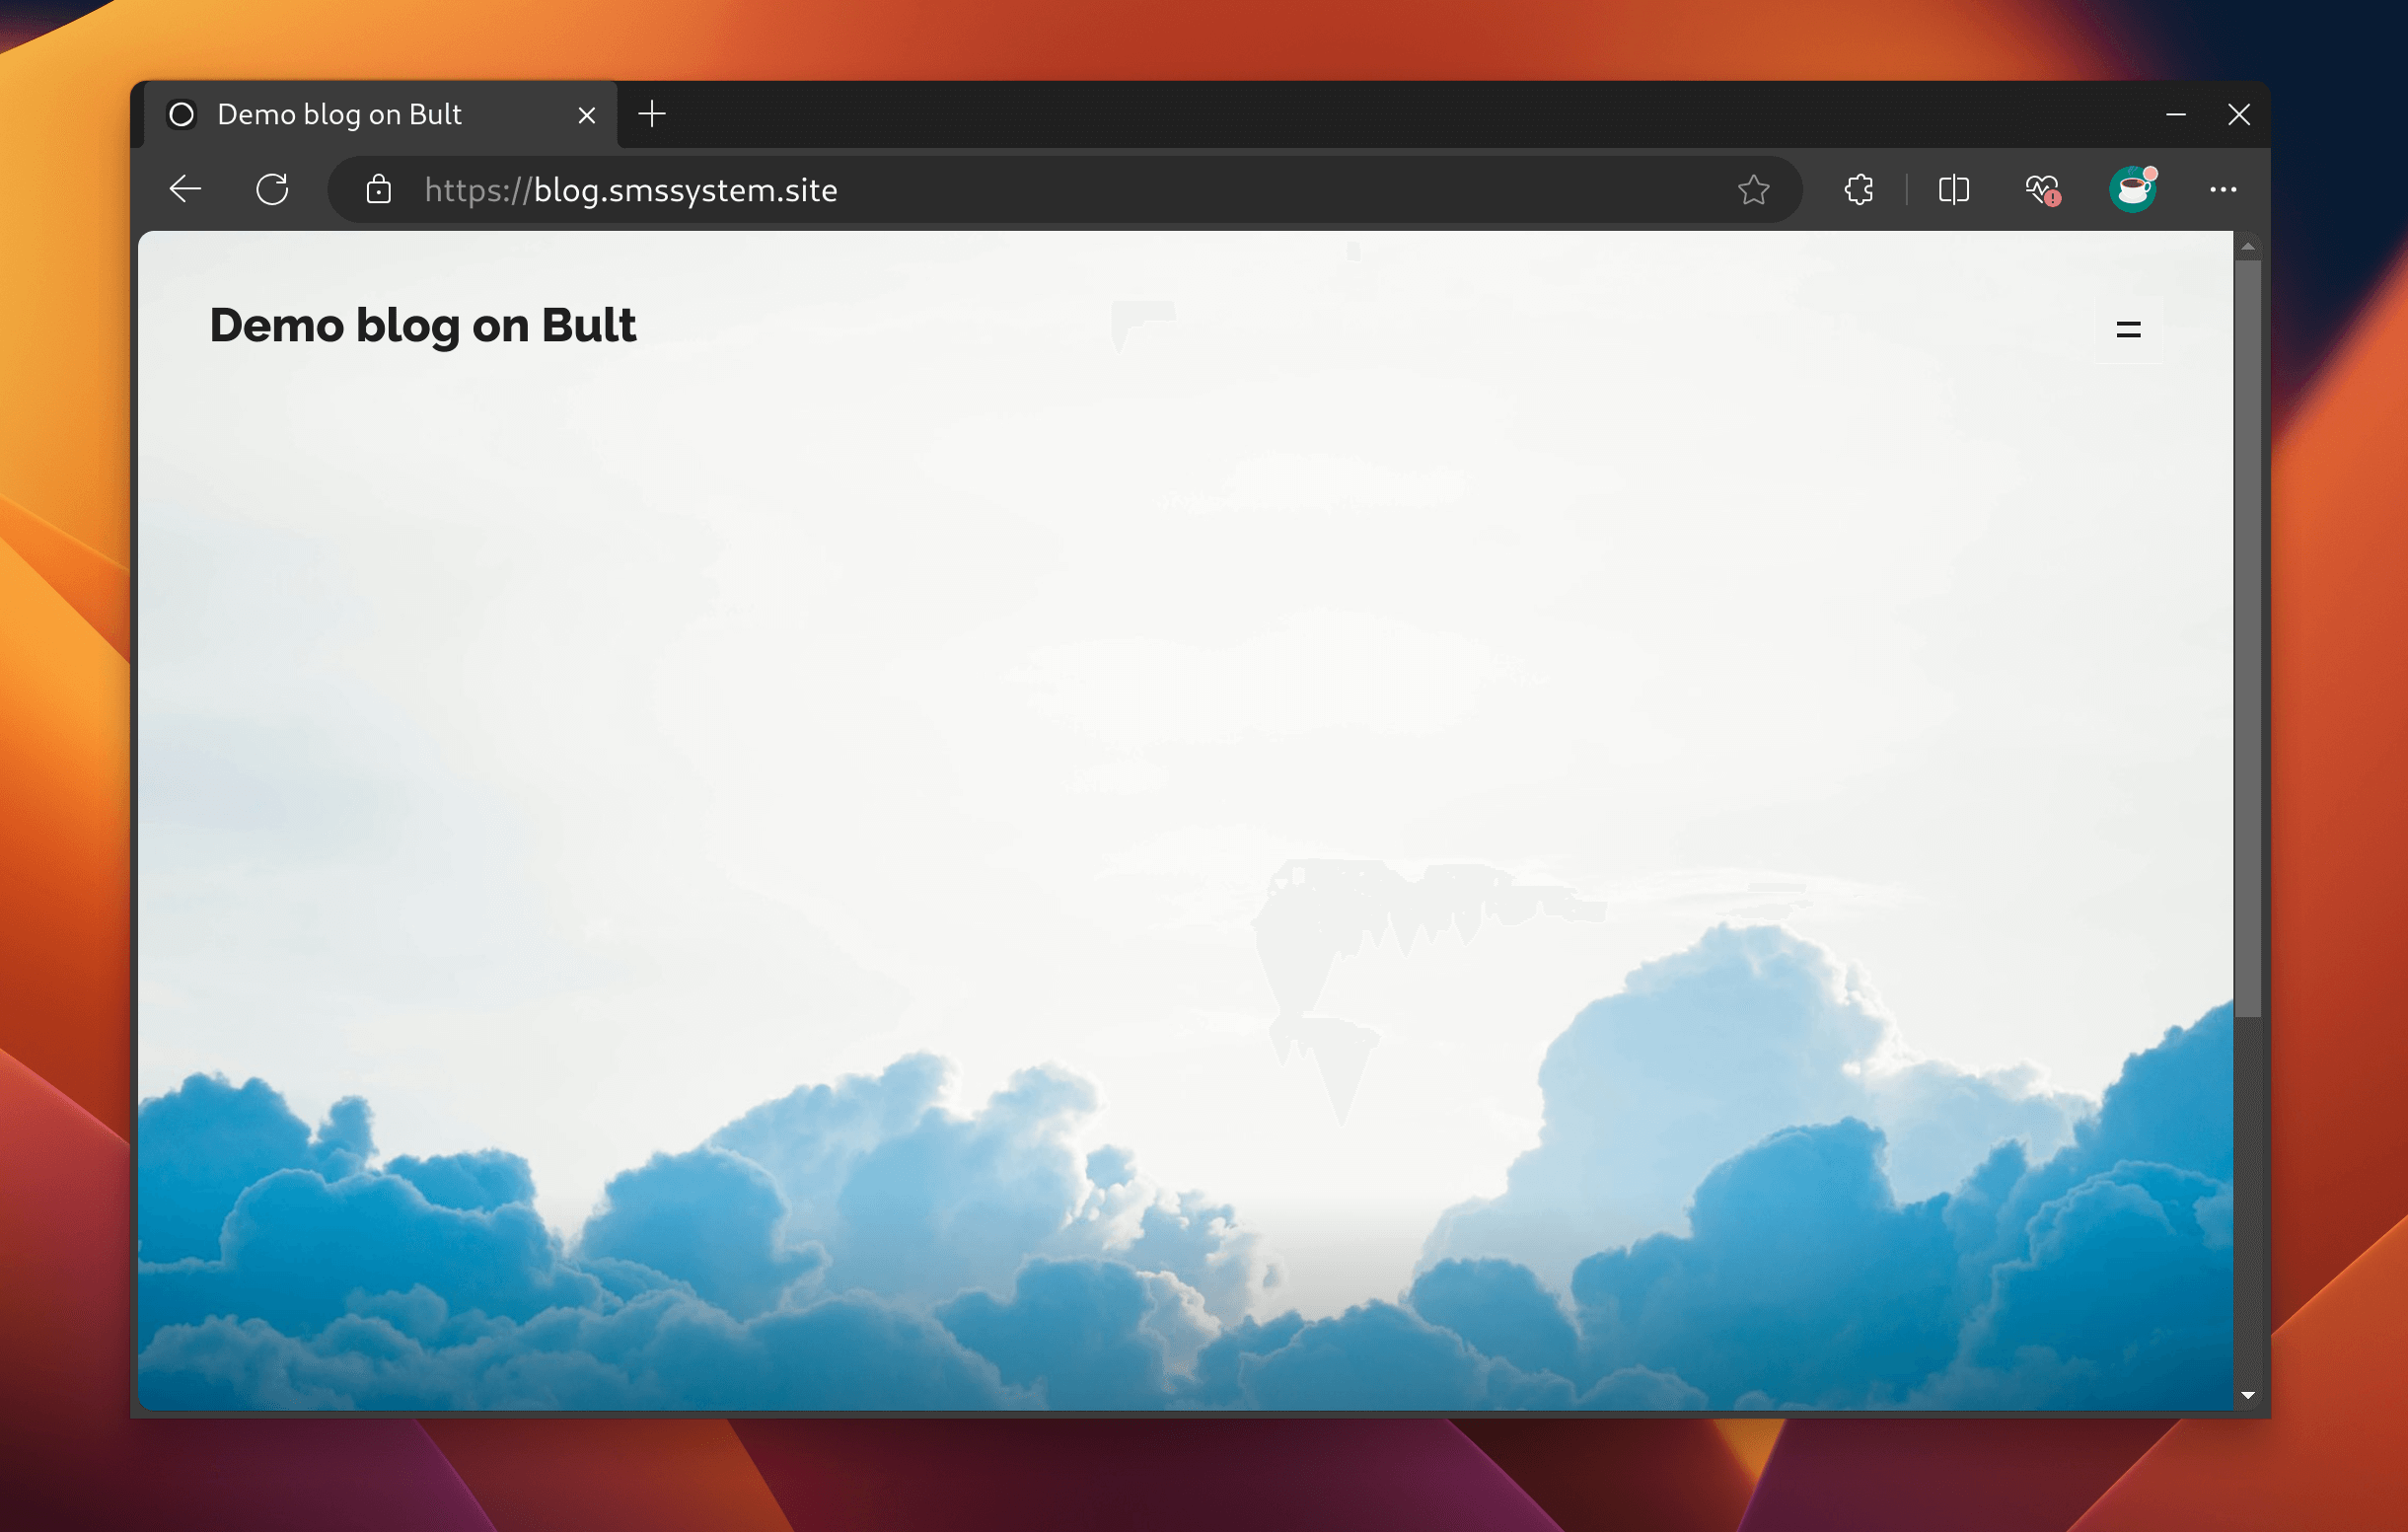
Let's open the binded domain in a new tab and see the blog platform page.
Finally 🎉
Congrats! You successfully deployed a Project! We hope, that it will be the beginning on the way of creating and deploying other great projects on Bult platform.
If you encounter any difficulties or confusion during the tutorial, feel free to contact us for help via the "Support" button in the lower right corner of the screen. We will do our best to help you with the problem.